Installation Guide
This page shows you how to install the package.
Contents
- Introduction
- Installing from the Unity Asset Store
- Installing using the Package Manager via a Scoped Registry
- Assembly Definitions References
- Installation Errors
Introduction
You can either install the package from the Unity Asset Store, or from the package website via a custom package manager registry. Both alternatives work fine, but the custom registry is a bit more robust (until Unity improves their package manager), and it allows you to access beta versions of the package.
Installing from the Unity Asset Store
Make sure you are logged in to the same Unity account in the Unity editor that you purchased the package with.
If you are upgrading from version 4, you must delete your previous installation before upgrading, to avoid conflicts. You may also want to check out the Upgrade Guide. If you have previously installed the beta version via a scoped registry, you can continue using that method instead.
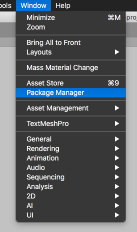
Open the Unity Package Manager.
Open the "My Assets" tab.
Click on the A* Pathfinding Project package.
Click on "Import to project".
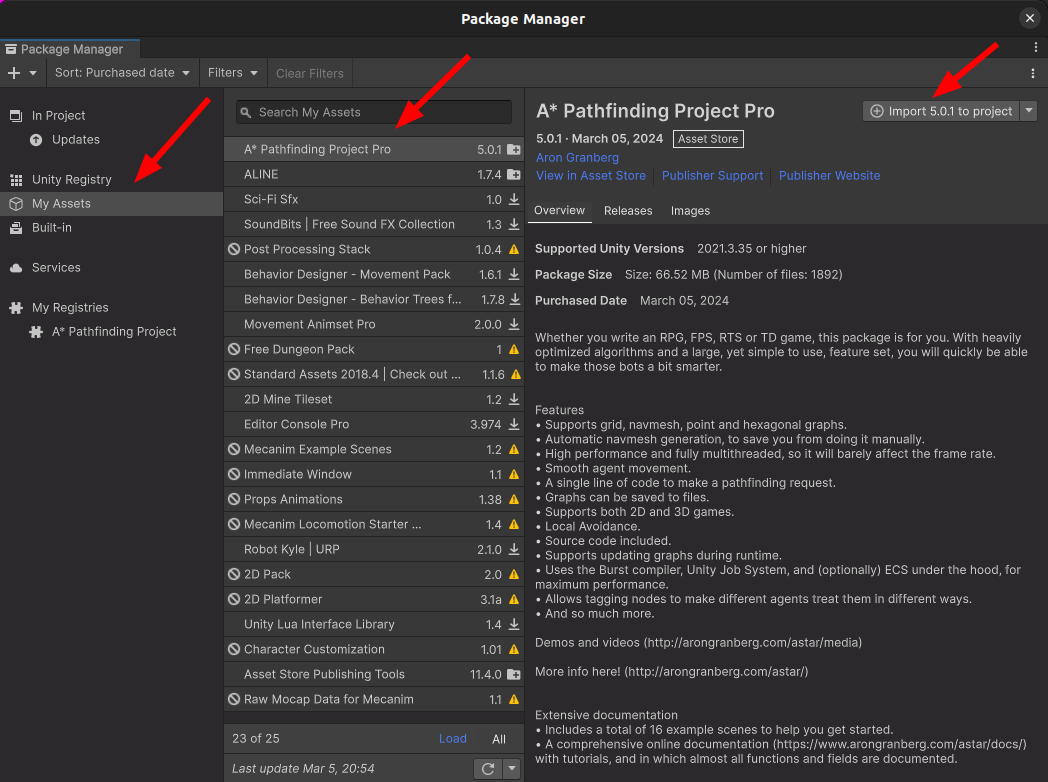
Note
The package will be imported into the Packages folder in Unity. It will not be present in your Assets folder.
Importing Example Scenes
It is also recommended to import the example scenes. These are confusingly not accessible from the same place in the package manager.
After you have imported the package, go to "In Project" (in the package manager).
Click on the "A* Pathfinding Project [custom]" package (there may be two A* packages in this view, make sure you click on the right one).
Go to the "Samples" tab.
Click "Import".
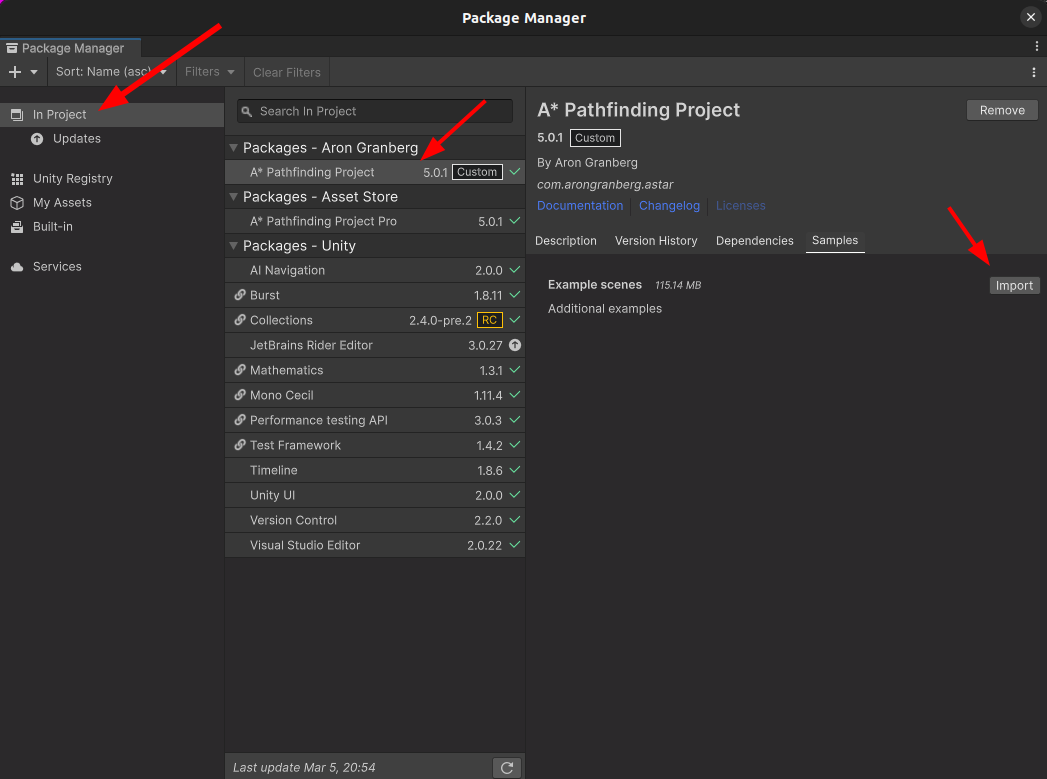
All dependencies should be imported automatically.
See
Assembly Definitions References, if you are using .asmdef files for your code.
Installing using the Package Manager via a Scoped Registry
You can also install the A* Pathfinding Project using a scoped registry via the package website. This is used to gain access to beta versions, and it's also easier to switch between different versions of the package using this method.
Follow the instructions on the linked page to add the scoped registry to your project, and then you can install the package using the package manager. Nothing else needs to be done after you have imported the package.
You can optionally import the example scenes from the Unity Package Manager. By default they are not imported.
See
Assembly Definitions References, if you are using .asmdef files for your code.
Assembly Definitions References
If you are using Assmebly Definition Files (.asmdef) files in your project, you will need to add a few references to be able to use pathfinding from your own code.
Note
If you've never heard of .asmdef files, you are probably not using them, and you can skip this section.
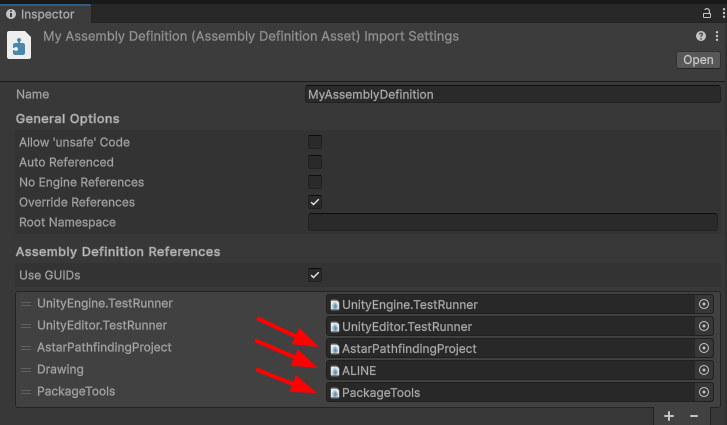
Find all .asmdef files that you use for your code (not the ones in the pathfinding package, or any other unrelated 3rd party libraries).
In the "Assembly Definition References" section, add the "AstarPathfindingProject", "ALINE", and "PackageTools" assemblies as references.
Enable "Use GUIDs" for improved compatibility.
Click Apply.
Installation Errors
Here's a list of errors that you might encounter when importing the package and how to fix them.
"Metadata file 'Library/PackageCache/com.unity.ext.nunit@1.0.6/net40/unity-custom/nunit.framework.dll' could not be found"
This error is caused by a Unity bug. Restarting Unity usually resolves the error.
The type or namespace name 'Pathfinding' could not be found
If the package seems properly installed, this might arise in your own scripts when you try to use the package. This is usually caused by using .asmdef files in your project. You will need to select the one relevant for your script, and add the AstarPathfindingProject assembly as a reference.
Other errors
If you encounter other errors, these are good things to try:
Make sure you are using a supported version of Unity.
Make sure dependencies seem properly installed.
Try to delete the package, and install it again.
Restart Unity.