Recast graph in a 2D game
Example scene which demonstrates a recast graph in a 2D level.
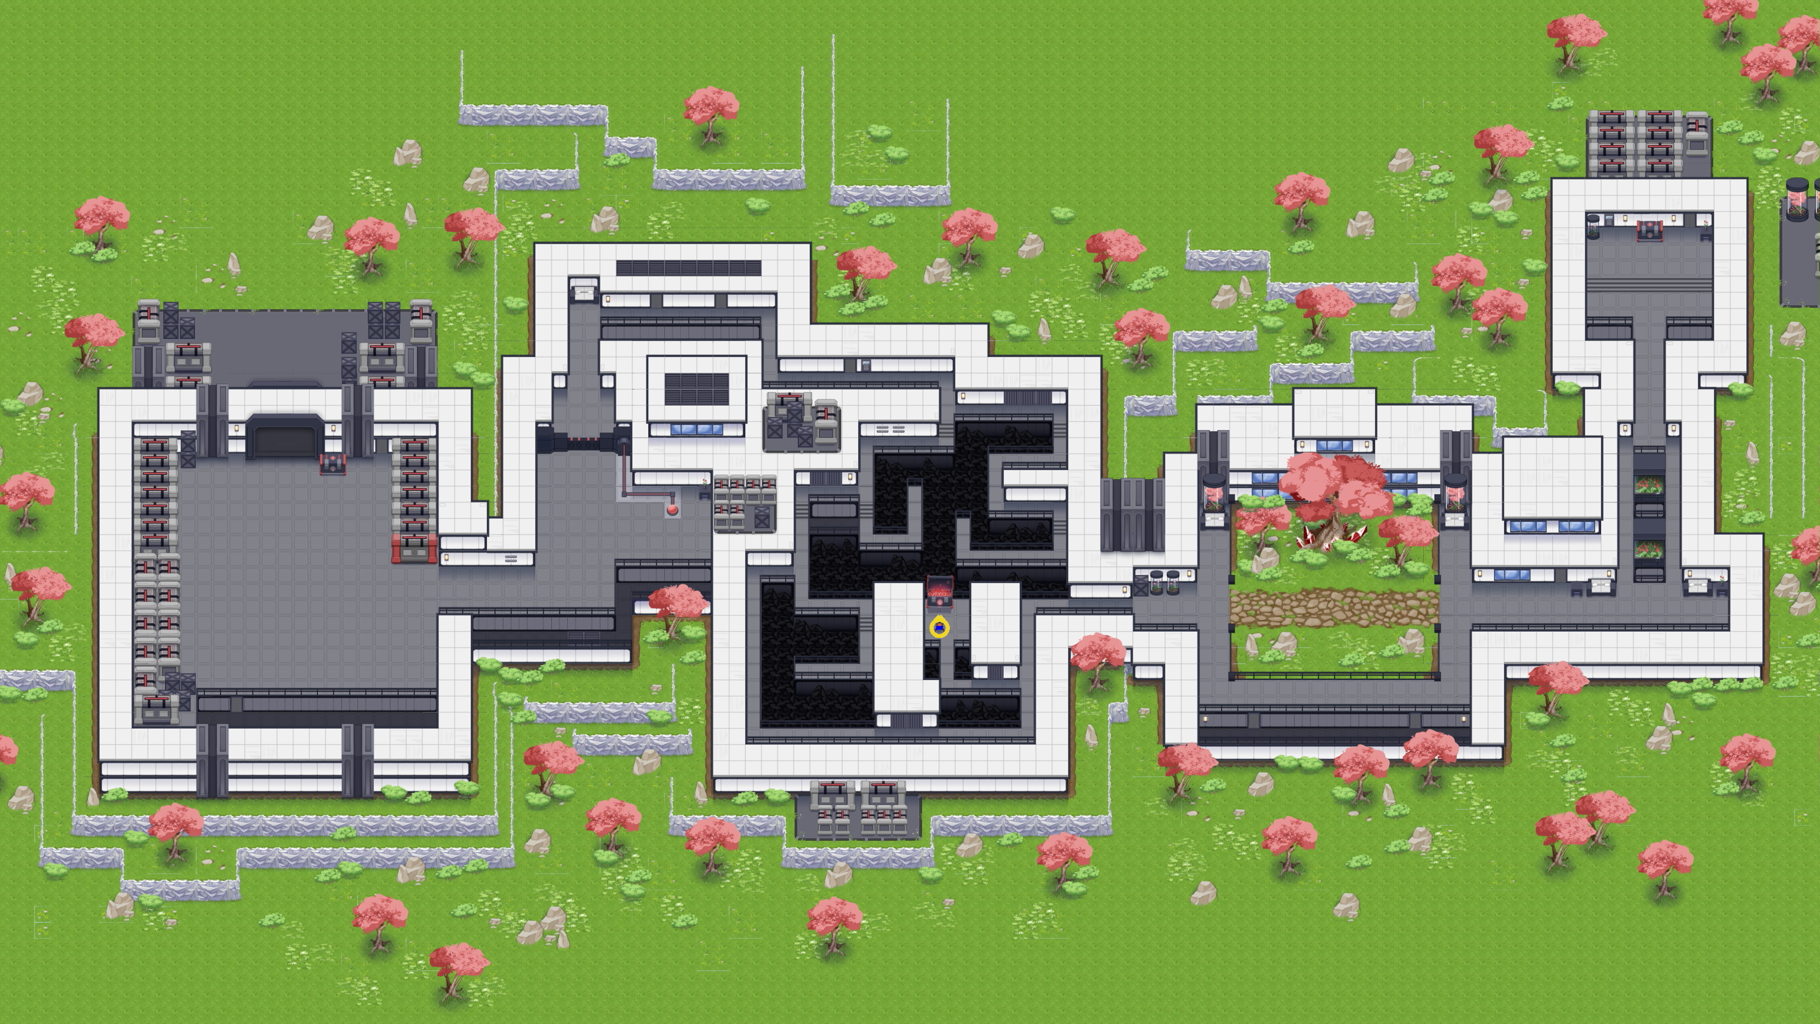
This example shows how to use a recast graph in a 2D level, utilizing both sprites and tilemaps.
You can click to move the character around in the scene.
Contents
Graph setup
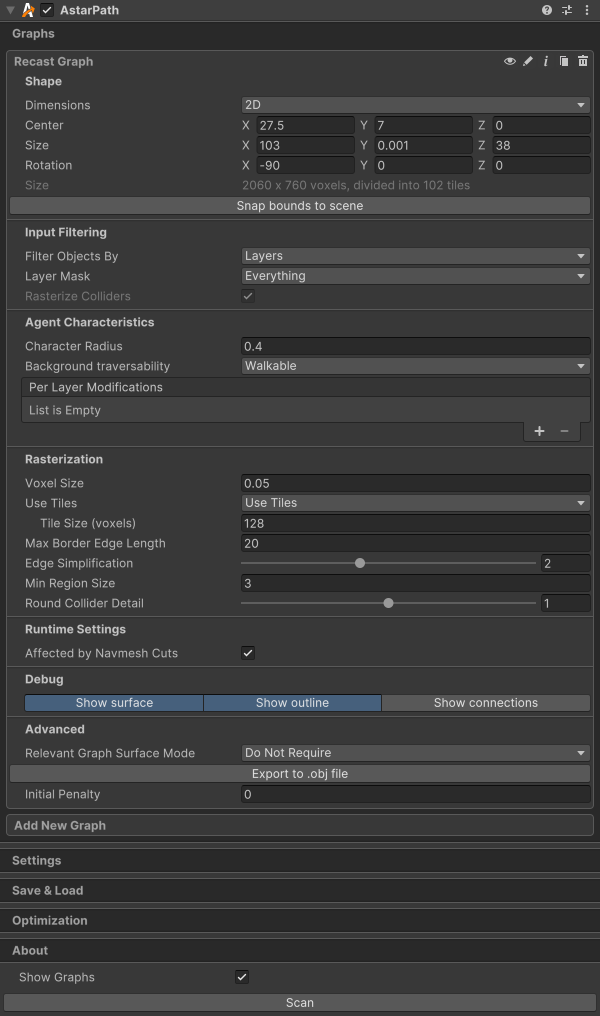
To use a recast graph in 2D mode, the dimensions field is changed to "2D". Additionally, the RecastGraph.rasterizeColliders option must be enabled, as in 2D mode, the recast graph can only rasterize colliders, not meshes. After the graph has been oriented correctly and dimensioned to fit the scene, the graph can be scanned.
The most notable changes that have been made to the graph configuration are:
The graph has been changed to 2D mode.
The cell size of the graph has been reduced a bit to make it represent the world more accurately.
The character radius has also been changed to reflect the size of the agents that will be used in the scene.
The bounding box of the graph has been changed to fit the world.
The graph has been changed to rasterize colliders, instead of meshes, which is the default.
The 'Background Traversability' setting on the recast graph has been set to "Walkable". This is because we want everything that is not an obstacle to be walkable.
Tilemaps
Tilemaps are supported by the recast graph as long as you attach a TilemapCollider2D component to the tilemap GameObject, and the object is included in the recast graph's layer mask.
Door
There's a door that can be opened by clicking on the red button connected to it. This will move the agent there and play an animation that opens the door. The logic is handled by the Interactable component. It will first move the agent to the button, and then play the animation on the door.
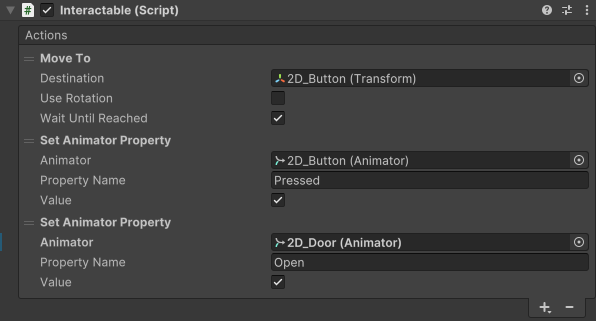
The opening animation will disable the collider on the door, and this will, in turn, make the DynamicObstacle component (also attached to the door) recalculate the graph around the door from scratch.
Chest
There's a chest that can be opened by clicking on it. This will move the agent there and play an animation that opens the chest. Chests are described in more detail in Chests.
Character animation
The character animation is handled by the MecanimBridge2D script.

How much to smooth the velocity of the agent.
The natural movement speed is the speed that the animations are designed for.
How the agent's rotation is handled.
For this agent, we set the rotation mode to Hide, because we don't want the agent's transform to rotate. Instead, different sprites are used to indicate which direction the agent is facing.
The MecanimBridge2D script will forward the movement velocity to the animator component using the following animator parameters:
InputMagnitude: Movement speed, normalized by the agent's natural speed. 1 if the agent is moving at its natural speed, and 0 if it is standing still.
X: Horizontal movement speed, normalized by the agent's natural speed.
Y: Vertical movement speed, normalized by the agent's natural speed.
In the animator controller, the root has two states: Moving and Idle. These are two blend trees that are transitioned between, depending on if the InputMagnitude is high enough.
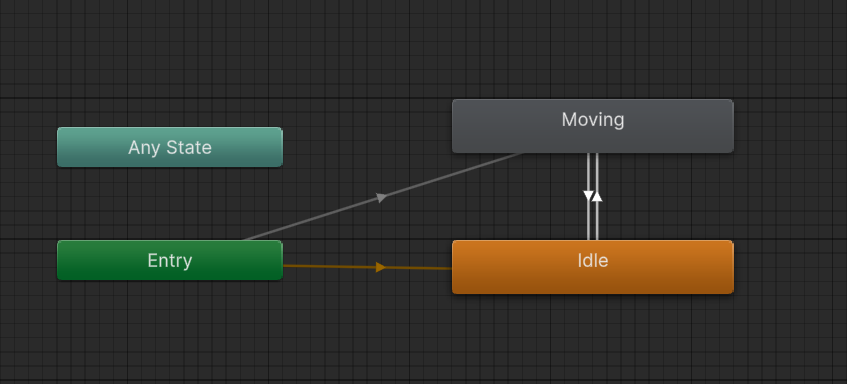
The Moving blend tree blends between different animations depending on the X and Y parameters. Each animation plays back a sequence of sprites to animate the character. When Unity blends between the clips, it will use the sprite which is given the highest weight in the blend tree. The Moving blend tree is also configured to multiply its speed by the InputMagnitude parameter, so that the animation will play faster or slower depending on how fast the agent is moving.
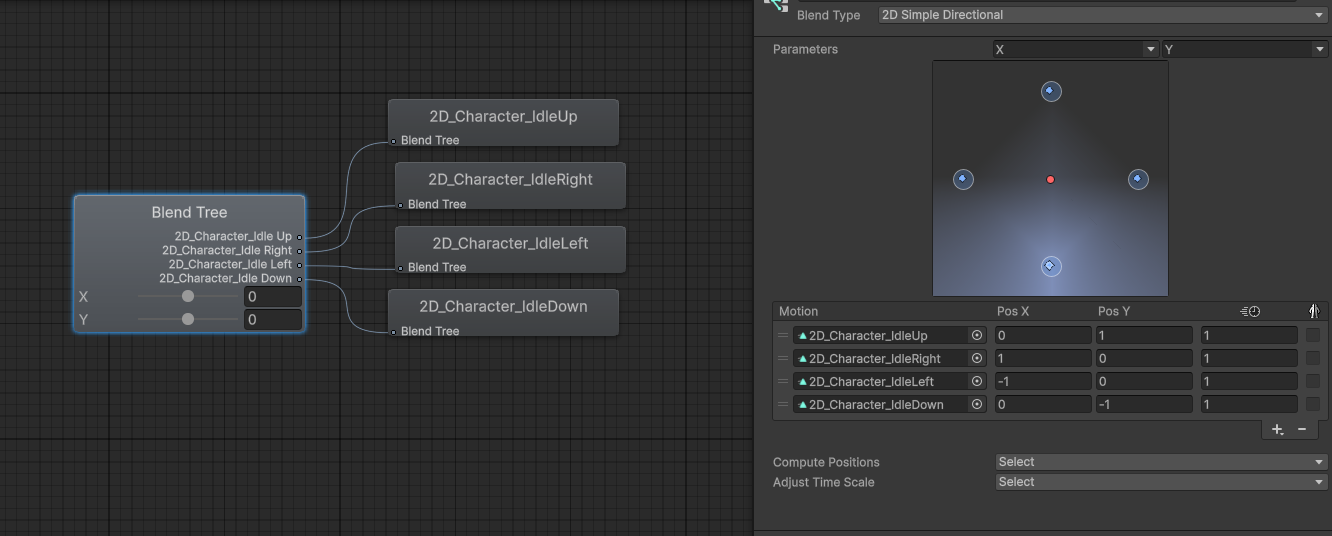
The Idle blend tree looks much the same, except that the animations are different.